Understanding AWS EventBridge: A Comprehensive Guide

AWS EventBridge is a powerful event-driven service that allows developers to create highly scalable, event-driven architectures in the cloud. In recent years, event-driven architecture (EDA) has become increasingly popular in the world of cloud computing. This approach to building software systems is based on the concept of events – discrete occurrences that trigger actions or processes within an application.

In an event-driven architecture, different components of an application communicate through events, enabling a more loosely coupled and scalable system. This allows for a more flexible and resilient approach to building applications, as different components can react and respond to events in real-time.

AWS EventBridge is a fully managed event bus service that integrates with a wide range of AWS services and third-party applications. It simplifies the process of building event-driven architectures by providing a centralized event bus, event routing, and event filtering capabilities.

The purpose of this article is to provide a comprehensive understanding of AWS EventBridge. We will explore its key features, use cases, and benefits, as well as how it fits into the larger landscape of event-driven architecture in modern cloud computing. By the end of this article, readers will have a thorough understanding of how to leverage AWS EventBridge to build highly scalable and event-driven applications in the cloud. So, let’s dive in!

What is AWS EventBridge?

Amazon EventBridge is a serverless event bus service provided by Amazon. It allows developers to build event-driven architectures and integrate various AWS services, SaaS applications, and custom applications.

EventBridge is a serverless event bus that processes events from various event sources such as Amazon CloudWatch, Amazon SNS, AWS Lambda, API Gateway, and more. Developers can use EventBridge to route events to specific AWS services like Lambda functions, SQS, and Step Functions.

EventBridge provides a schema registry to define the structure of the event data and content-based event filtering to route events based on their content.

Event-driven Architecture Fundamentals

Event-driven architecture is a powerful design pattern that enables the creation of scalable, real-time data integrations using AWS services. At its core, the architecture revolves around the concept of events, which trigger actions in response to specific occurrences. To implement event-driven architecture using AWS, developers can leverage services such as EventBridge, which serves as a central hub for event ingestion and processing. EventBridge supports custom events, event patterns, and event integration with a variety of AWS applications and services. It is natively integrated with services like AWS Lambda functions, making it easier to build event-driven applications or services.

Additionally, EventBridge simplifies the process of integrating with external sources by providing a scalable event bus that enables seamless communication between different systems. The EventBridge schema registry stores the structure of incoming events, ensuring that data is properly interpreted and processed by downstream applications. By directly integrating with a variety of AWS services and with built-in event sources, EventBridge makes it easy to exchange data in real-time and connect with SAAS applications via event patterns.

aws eventbridge running

How Does AWS EventBridge Work?

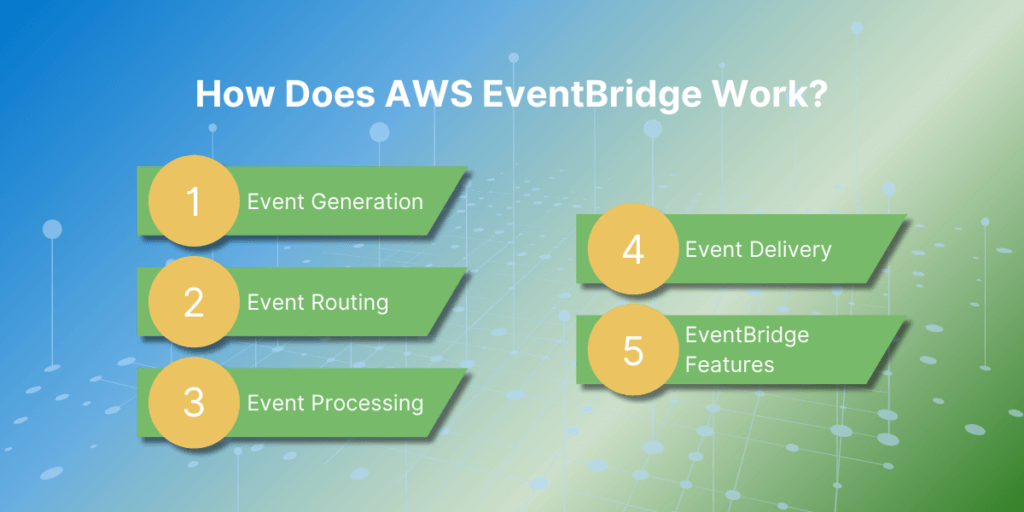
Here is a step-by-step explanation of how AWS EventBridge works:

  1. Event Generation: The first step in the EventBridge process is event generation. Events can originate from different sources, such as AWS services, custom applications, or SaaS applications. These events can be triggered by a specific action, such as a new file being uploaded to an Amazon S3 bucket, or they can be scheduled events, such as a daily backup job.
  2. Event Routing: Once an event is generated, it is sent to the EventBridge service. EventBridge acts as a central hub for all events and routes them to their designated targets. This routing is based on rules that are set up by the user. These rules specify which events should be sent to which targets based on certain criteria, such as event type or source.
  3. Event Processing: After an event is routed to its target, it is processed according to the designated action. For example, if the target is an AWS Lambda function, the event will trigger the function to execute a specific code. If the target is an SQS queue, the event will be stored in the queue for later processing.
  4. Event Delivery: Once the event is processed, EventBridge delivers a response to the source of the event. This response can include information about the success or failure of the event processing, which helps to track the status of events and troubleshoot any issues.
  5. EventBridge Features: EventBridge offers several features to help manage events efficiently. These include event filtering, event transformation, and event replay. Event filtering allows users to specify which events should be routed to which targets, while event transformation allows users to modify the event data before it is sent to the target. Event replay allows users to replay past events in case of any failures or missed events.

Core Features of AWS EventBridge

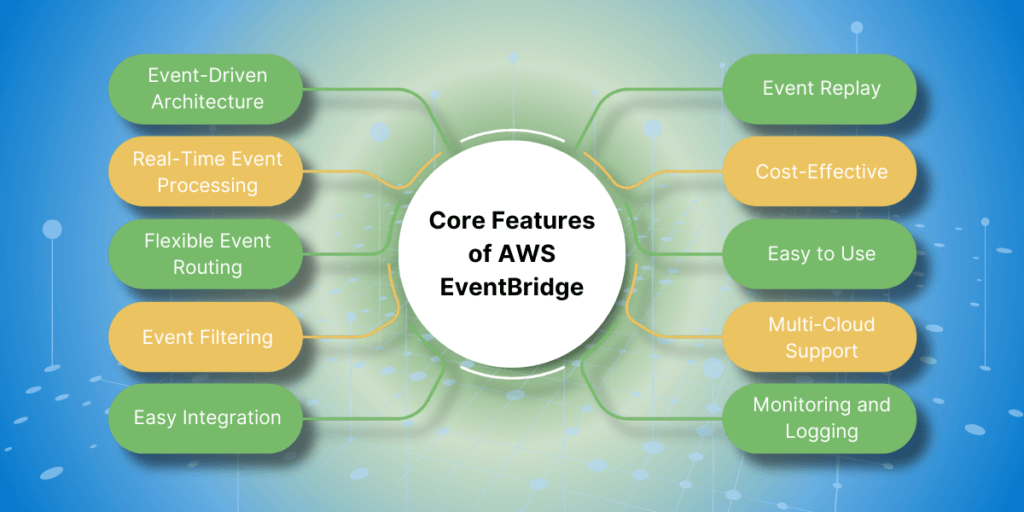
  1. Event-Driven Architecture: AWS EventBridge is designed to support event-driven architecture by allowing you to create event-based workflows and integrations. This means that actions are triggered by events, instead of being scheduled or manually initiated.
  2. Real-Time Event Processing: EventBridge can process events in real-time, allowing you to quickly respond to changes and updates in your environment. This makes it ideal for applications that require real-time data processing, such as streaming analytics and real-time monitoring.
  3. Flexible Event Routing: With EventBridge, you can easily route events to multiple targets, such as AWS Lambda functions, Amazon SNS topics, and Amazon SQS queues. This allows for greater flexibility and scalability in your event-based workflows.
  4. Event Filtering: EventBridge allows you to filter events based on specific criteria, such as event source, event content, and event time. This helps you to manage and process only the events that are relevant to your applications.
  5. Easy Integration: EventBridge integrates seamlessly with other AWS services, as well as third-party applications and services. This makes it easy to incorporate event-based workflows into your existing infrastructure.
  6. Event Replay: With EventBridge, you can replay events from the past 24 hours, making it easy to test and troubleshoot your event-based workflows. This can also be useful for recovering from errors or failures.
  7. Cost-Effective: EventBridge follows a pay-per-event pricing model, which means you only pay for the events that are processed by the service. This makes it a cost-effective solution for event-driven applications.
  8. Easy to Use: EventBridge is easy to set up and use, with a simple interface and intuitive features. This allows developers to quickly create event-based workflows without a steep learning curve.
  9. Monitoring and Logging: EventBridge provides detailed monitoring and logging capabilities, allowing you to track the performance of your event-based workflows and troubleshoot any issues that may arise.

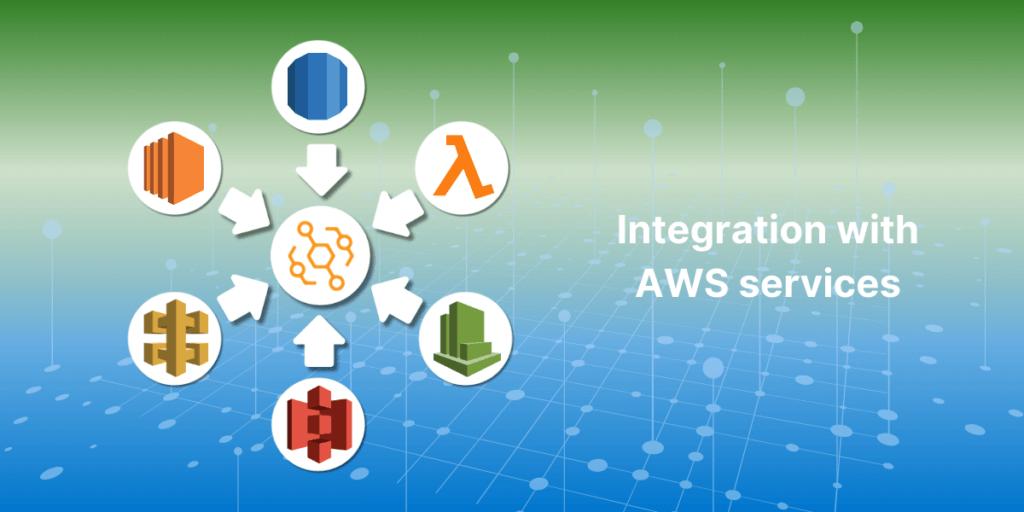
Integration with AWS services

Amazon Web Services (AWS) offers a wide range of cloud computing services that can be integrated with other applications and services. This allows for a more efficient and seamless flow of data between different systems, as well as providing access to powerful tools and features that can enhance the functionality of your application.

Some of the most popular AWS services that can be integrated with other applications include:

  1. Amazon S3 (Simple Storage Service): This service allows for secure and scalable storage of data in the cloud. It can be integrated with applications to store and retrieve data, such as user files, media, and backups.
  2. Amazon EC2 (Elastic Compute Cloud): This service provides virtual servers, known as instances, that can be used to run applications. It can be integrated with other services to provide a scalable and reliable infrastructure for your application.
  3. Amazon RDS (Relational Database Service): This service allows for the creation and management of relational databases in the cloud. It can be integrated with applications to store and retrieve data, such as user profiles, product information, and more.
  4. Amazon API Gateway: This service allows for the creation, management, and deployment of APIs. It can be integrated with applications to enable secure and efficient communication between different systems.
  5. Amazon Lambda: This service allows for the execution of code in response to events or triggers. It can be integrated with applications to automate tasks and processes, such as data processing or sending notifications.
  6. Amazon CloudWatch: This service provides monitoring and logging capabilities for your AWS resources. It can be integrated with applications to track and analyze performance metrics, as well as set up alerts and notifications.
  7. Amazon SES (Simple Email Service): This service allows for the sending and receiving of email messages. It can be integrated with applications to send transactional or marketing emails to customers.
  8. Amazon SNS (Simple Notification Service): This service allows for the sending and receiving of push notifications to mobile devices. It can be integrated with applications to send real-time updates and notifications to users.

Schema registry and discovery

Schema registry and discovery are two crucial components in the world of data management and integration. The schema registry serves as a centralized repository for storing and managing data schemas, ensuring consistency and compatibility across systems. On the other hand, discovery enables the automatic detection and sharing of data schemas, making it easier for applications to communicate with each other. Together, these two tools play a vital role in simplifying data integration and promoting data interoperability in complex environments.

Implementing AWS EventBridge

  • Create an EventBridge rule: To create an EventBridge rule, go to the AWS EventBridge console and click on the “Create rule” button. Give your rule a name and description, and then choose the event source. This can be an AWS service, a custom event bus, or an external event source. You can also choose to filter events based on specific criteria.
  • Configure targets: Next, you will need to configure the targets for your rule. These are the actions that will be performed when an event is received by the rule. You can choose from a variety of targets, such as Lambda functions, SNS topics, or Step Functions.
  • Set permissions: To allow your rule to send events to the chosen targets, you will need to set permissions. This can be done by creating a new IAM role or using an existing one.
  • Test your rule: Once your rule is created and configured, you can test it by sending test events to it. This will allow you to see if your rule is triggering the desired actions.
  • Monitor your rule: You can monitor the execution of your rule and the events it receives by going to the EventBridge console and viewing the rule’s dashboard. This will show you the number of events received, any errors, and the status of the targets.
  • Manage and update your rule: You can manage and update your rule as needed by going to the EventBridge console and selecting your rule. From here, you can edit the rule, add or remove targets, and change the event source or filtering criteria.
  • Automate with CloudFormation: To easily deploy and manage multiple EventBridge rules, you can use AWS CloudFormation. This allows you to define your rules in a template and easily deploy them to different environments.
  • Use EventBridge with other AWS services: EventBridge can be integrated with other AWS services, such as AWS Lambda, Amazon SNS, Amazon SQS, and more. This allows for more complex and automated event-driven workflows.

Best Practices for Using AWS EventBridge

  1. Design Considerations for Event-Driven Architectures – іdentify the events and triggers. Start by defining the events that your system needs to respond to and identify the triggers that will initiate those events. This will help in designing a clear and efficient event-driven architecture.Choose the right event source: AWS EventBridge supports various event sources such as AWS services, custom applications, and SaaS providers. Choose the event source that best fits your use case.Design for scalability and fault tolerance: As your system grows, the number of events and triggers will increase. Design your architecture to handle this growth and ensure that it is fault-tolerant to handle any failures.Use event schemas: EventBridge allows you to define event schemas that can be used to validate the incoming events. Use schemas to ensure that the events are in the expected format and avoid processing invalid events.Consider event delivery guarantees: EventBridge offers two delivery guarantees – at least once and exactly once. Choose the delivery guarantee based on the criticality of your events and the impact of duplicate events.
  2. Security and Permissions – use IAM roles and policies. EventBridge integrates with AWS Identity and Access Management (IAM) to control access to resources. Use IAM roles and policies to grant permissions to users and services that need to access EventBridge.Enable encryption: Enable server-side encryption for your event bus to ensure that your events are always encrypted at rest.Use AWS KMS: Use AWS Key Management Service (KMS) to manage the encryption keys used by EventBridge. This ensures that you have full control over the encryption keys and can manage them centrally.Use resource policies: EventBridge supports resource policies that allow you to control access to your event buses at a more granular level. Use resource policies to restrict access to specific event buses to specific IAM users or roles.
  3. Monitoring and Troubleshooting Tips – use CloudWatch Metrics. EventBridge automatically publishes metrics to CloudWatch, which can be used to monitor the health of your event buses and rule executions. Use these metrics to set up alarms and get notified of any issues.Enable CloudTrail: CloudTrail records API calls made to EventBridge, which can be useful for troubleshooting and auditing purposes. Enable CloudTrail and review the logs in case of any issues.Use CloudWatch Logs: EventBridge allows you to log events to CloudWatch Logs, which can help in troubleshooting and debugging your event-driven architecture. Use CloudWatch Logs to view the details of incoming events and troubleshoot any errors.Use Amazon EventBridge Console: The Amazon EventBridge console provides a visual representation of your event buses, rules, and targets. Use the console to monitor the flow of events and troubleshoot any issues with your event-driven architecture.

Comparing AWS EventBridge with Alternatives

There are a few alternatives to AWS EventBridge, and here we will compare it with some of the popular options:

  1. AWS Simple Queue Service (SQS): AWS SQS is a managed message queue service that allows decoupling of components in a distributed system. It is a reliable and highly available service that can handle large volumes of messages. Unlike EventBridge, SQS does not have built-in event routing and transformation capabilities. Users have to handle these functionalities themselves by using other AWS services like AWS Lambda or Amazon Simple Notification Service (SNS). This can require additional development effort and may not be suitable for complex event-driven architectures.
  2. Apache Kafka: Apache Kafka is an open-source distributed event streaming platform. It is highly scalable and can handle large volumes of events. Kafka provides features such as event routing and transformation through its Streams API. However, setting up and managing Kafka clusters can be complex and requires a significant amount of resources. It may not be suitable for smaller applications or those without dedicated DevOps resources.
  3. Google Cloud Pub/Sub: Google Cloud Pub/Sub is a fully managed event streaming service provided by Google Cloud Platform. It offers similar capabilities to AWS EventBridge, such as event routing and transformation. However, it is limited to Google Cloud services and does not have integrations with third-party applications. This can be a drawback for users who need to connect their custom applications or services from other cloud providers.
  4. Azure Event Grid: Azure Event Grid is a serverless event routing service offered by Microsoft Azure. Like AWS EventBridge, it supports event filtering, routing, and transformation. However, it is limited to Azure services and does not have integrations with third-party applications. It also has a lower event processing limit compared to AWS EventBridge. This can be a limitation for applications that require high event processing volumes.

Real-world Use Cases

  • Automated Workflows and Process Automation: AWS EventBridge can be used to create automated workflows and processes, helping organizations to streamline their operations and reduce manual work. For example, an e-commerce company can use EventBridge to trigger a series of events when a customer places an order, such as sending a confirmation email, updating inventory, and initiating the shipping process.
  • Serverless Architecture and Microservices: EventBridge is a key component in building serverless architectures and microservices on AWS. It allows different services and applications to communicate with each other through events, reducing the need for complex integrations and point-to-point connections. This enables organizations to build scalable and flexible systems that can handle large volumes of data and events.
  • Data Ingestion and Processing: EventBridge can be used for real-time data ingestion and processing, making it an ideal solution for streaming data from various sources. For example, a media company can use EventBridge to ingest and process user interaction data from their website, social media, and mobile apps in real-time, allowing them to make data-driven decisions and personalize user experiences.
  • Monitoring and Alerting: EventBridge can be used for monitoring and alerting in cloud environments. It can receive events from different AWS services, such as Amazon CloudWatch, and trigger actions or send alerts based on predefined rules. This allows organizations to proactively monitor their resources and respond to any issues or anomalies in real-time.
  • DevOps and CI/CD Pipelines: EventBridge can be integrated with DevOps tools and services to automate the deployment and management of applications. It can receive events from source code repositories, build and test systems, and deployment tools, triggering actions and updates as needed. This enables organizations to build efficient and reliable CI/CD pipelines for their software development processes.
  • Cloud Infrastructure Management: EventBridge can be used to manage and automate cloud infrastructure, such as launching and terminating instances, scaling resources, and managing backups. This helps organizations to optimize their cloud resources and reduce costs by automatically scaling up or down based on demand.
  • IoT Applications: EventBridge can be used for building event-driven IoT applications. It can receive events from IoT sensors and devices, triggering actions and updates in real-time. For example, a smart home system can use EventBridge to control and automate devices based on events, such as turning on lights when a person enters a room.
  • Data Analytics and Machine Learning: EventBridge can be integrated with AWS services for data analytics and machine learning, such as Amazon Kinesis and Amazon SageMaker. This allows organizations to capture and process events in real-time and use the data for training machine learning models and making data-driven decisions.
  • Chatbots and Voice Assistants: EventBridge can be used to build chatbots and voice assistants that can respond to user requests and trigger actions based on events. For example, a customer service chatbot can use EventBridge to access customer information and provide personalized responses based on events, such as a customer placing an order or requesting a refund.
  • Third-Party Integrations: EventBridge can be used to integrate with third-party services and applications, such as CRM systems, marketing automation tools, and payment gateways. This enables organizations to automate workflows and processes across different systems, improving efficiency and reducing manual work.

Summary

AWS EventBridge stands out as a versatile and robust service designed to facilitate the creation and management of event-driven architectures in the cloud. By providing a centralized event bus with seamless integration capabilities, it enables developers to connect various AWS services, third-party applications, and custom applications through events. This fosters the development of scalable, resilient, and real-time responsive systems.

EventBridge’s core features—such as flexible event routing, real-time event processing, and event filtering—make it an essential tool for building efficient and dynamic workflows. Its integration with AWS services like Lambda, S3, and CloudWatch further enhances its utility, simplifying complex event-driven processes. The service’s cost-effectiveness, ease of use, and support for multi-cloud environments ensure that organizations can leverage it without significant overhead.

Moreover, AWS EventBridge’s schema registry and discovery capabilities promote data consistency and interoperability, which are crucial for complex data integration tasks. The ability to automate processes, manage cloud infrastructure, and build serverless architectures underscores EventBridge’s role in modern cloud computing.

When comparing EventBridge to alternatives like AWS SQS, Apache Kafka, Google Cloud Pub/Sub, and Azure Event Grid, its seamless AWS ecosystem integration, coupled with extensive features for event routing and processing, offers a distinct advantage. This makes EventBridge particularly appealing for organizations already invested in AWS or seeking a fully managed event bus service.

In real-world scenarios, EventBridge proves invaluable across various domains, including automated workflows, data ingestion and processing, DevOps, IoT applications, and more. Its ability to trigger actions based on events enables businesses to streamline operations, enhance real-time data handling, and build responsive systems.

Overall, AWS EventBridge is a critical component for developers aiming to implement event-driven architectures in the cloud. Its comprehensive feature set, ease of integration, and support for diverse use cases make it a powerful tool for building scalable, flexible, and efficient cloud-native applications.

What are Amazon EBS Volumes?

Amazon EBS volumes (Elastic Block Store) is a high-performance, scalable block storage service from Amazon Web Services (AWS). It provides persistent storage volumes for Amazon EC2 instances, crucial for running applications and storing data in the cloud. EBS ensures low-latency, high-throughput data transfer for demanding applications.

Launched by AWS in 2008, EBS offers durable, reliable block-level storage for EC2 instances, addressing the need for persistent data storage in cloud environments. EBS has since added features like encryption, snapshots, and various volume types to meet different performance and cost needs.

EBS supports a wide range of use cases with high availability and durability through data replication within an Availability Zone. It offers multiple volume types, such as General Purpose SSD (gp2/gp3), Provisioned IOPS SSD (io1/io2), and Throughput Optimized HDD (st1), catering to different performance and budget requirements. EBS allows easy scaling of storage capacity and performance, with integrated backup solutions, encryption for data security, and seamless integration with other AWS services, making it essential for efficient and reliable cloud storage.

How Amazon EBS volumes work

Amazon EBS volumes offer high availability, durability, and the flexibility to scale, making them ideal for workloads that require stable and reliable storage. EBS volumes are designed to be highly available and reliable, with a wide range of performance options to suit different application needs.

To use an EBS volume, you first need to create it within the AWS Management Console. Once the EBS volume is created, it can be attached to any running EC2 instance. Here’s a step-by-step process on how EBS volumes can be attached to EC2 instances:

  1. Create an EBS Volume: Navigate to the “Volumes” section in the AWS Management Console, and click “Create Volume.” You can specify the type, size, and other settings based on your requirements.
  2. Attach the EBS Volume: After creating the EBS volume, select it and click on “Actions,” then choose “Attach Volume.” Select the relevant EC2 instance to which you want to attach the volume.
  3. Mount the Volume: Once the volume is attached, you need to mount it on the EC2 instance. Connect to the instance via SSH and use appropriate commands to format and mount the volume. For example, you can use lsblk to list block devices to mount the volume.

ebs multi attach

Attachments and Instances

EBS volumes are storage devices for Amazon EC2 instances, functioning as virtual hard drives with persistent block-level storage. Data on an EBS volume remains even after the EC2 instance is terminated.

Created independently from EC2 instances, EBS volumes can be attached to any EC2 instance in the same Availability Zone and can be detached and reattached as needed.

When attached to an EC2 instance, EBS volumes appear as block devices, like physical hard drives. Multiple EBS volumes can be attached to a single instance, allowing for data management flexibility and improved performance by distributing I/O across volumes.

Amazon EBS volumes can be backed up using snapshots, point-in-time copies that can create new volumes or restore data if lost.

Storage Types

  • General Purpose SSD (gp2): Default EBS storage, balanced price and performance. Baseline 3 IOPS/GB, max 3,000 IOPS.
  • Provisioned IOPS SSD (io1): For high-performance databases and I/O-intensive applications. Customizable IOPS, up to 64,000 IOPS per volume.
  • Throughput Optimized HDD (st1): Ideal for frequently accessed, throughput-heavy workloads like big data and log processing. Low cost per GB, up to 500 MB/s throughput per volume.
  • Cold HDD (sc1): Best for infrequently accessed data, such as backups. Lowest cost per GB, with a max throughput of 250 MB/s per volume.

Features of Amazon EBS Volumes

Amazon EBS volumes offers the following features and benefits:

  • Multiple Volume Types: Choose from SSD-backed storage for transactional workloads and HDD-backed storage for throughput-intensive workloads to optimize performance and costs.
  • Scalability: Dynamically adjust volume capacity and performance without downtime using Elastic Volumes.
  • Backup and Recovery: Use EBS snapshots for data backup and quick restoration, as well as data transfer across AWS accounts, regions, or availability zones.
  • Data Protection: Encrypt volumes and snapshots to secure data-at-rest and data-in-transit.
  • Data Availability and Durability: io2 Block Express volumes provide 99.999% durability, with other volumes ensuring 99.8% to 99.9% durability. Data is replicated across multiple servers within an availability zone.
  • Data Archiving: EBS Snapshots Archive offers a cost-effective storage tier for archiving snapshots for 90 days or more.

Amazon EBS is a highly versatile and integral component of AWS that provides scalable, high-performance block storage for EC2 instances. EBS volumes function as virtual hard drives, ensuring persistent data storage even after instances are terminated. They can be easily created, attached, detached, and reattached across EC2 instances within the same Availability Zone, offering users flexibility and control over their storage solutions.

Amazon EBS supports various volume types tailored to different performance and cost needs, including General Purpose SSD (gp2), Provisioned IOPS SSD (io1), Throughput Optimized HDD (st1), and Cold HDD (sc1). Each type offers distinct characteristics suitable for a range of workloads, from high-performance databases to long-term data storage.

Overall, Amazon EBS volumes is an essential service for users requiring reliable, flexible, and high-performance storage solutions within the AWS ecosystem, supporting a wide range of applications and workloads with its robust set of features and capabilities.

How to start with Amazon EBS? 

Take the next step towards a more efficient and powerful cloud infrastructure. Contact us now to discover how CloudAvocado can transform your storage strategy with Amazon EBS. 

Spot Instances vs Reserved Instances: Which is Right for You?

Choosing the right cloud pricing model is a balancing act. While you strive for cost-effectiveness, ensuring smooth operation for your workloads remains paramount. Within the massive landscape of Amazon Web Services (AWS) options, two prominent players emerge: Spot Instances and Reserved Instances. Both offer significant cost advantages over on-demand pricing, but they cater to distinct needs. Let’s look into the functionalities, pricing structures, and ideal use cases of Spot and Reserved Instances, empowering you to make an informed decision for your specific requirements.

Spot Instances

Due to the fact that AWS has a large infrastructure, there will always be some unused resources. To reduce the cost of maintaining these idle resources, AWS introduces Spot Instances.

Spot Instances are a type of cloud computing resource offered by Amazon EC2 (Elastic Compute Cloud) that utilizes excess capacity at significantly discounted prices. These instances operate on a dynamic pricing model, where the cost fluctuates based on supply and demand. Users place bids for the desired instance type and Availability Zone, and if the bid exceeds the current Spot price, they gain access to the instance. However, AWS can reclaim these instances at any time, giving only a two-minute notice if the capacity is needed for Reserved or on-demand requests.

The primary advantage of Spot Instances is their substantial cost savings. Discounts can reach up to 90% compared to on-demand pricing, making them highly attractive for workloads that can tolerate interruptions. Typical use cases include batch processing jobs, data analysis pipelines, and web scraping. The cost-effectiveness of Spot Instances allows businesses to run large-scale computations at a fraction of the cost.

However, the potential for interruptions is a significant risk. AWS can terminate Spot Instances with little notice, which necessitates a strategic approach to manage these interruptions. Tools and strategies for automatic instance replacement and task resumption are crucial to maintain the continuity of operations. Additionally, the constantly changing Spot prices can complicate budgeting and cost forecasting.

Despite these challenges, Spot Instances offer exceptional scalability and flexibility. Users can scale resources up or down by adjusting their bids according to workload requirements. With a wide range of EC2 instance types available, Spot Instances provide the flexibility to choose the most suitable configuration for any task, from high-performance computing to simpler tasks.

Reserved Instances

Reserved Instances (RIs), on the other hand, offer a stable and predictable approach. They provide a commitment-based way to secure EC2 instances at a discounted rate. By committing upfront for a specific instance type, Availability Zone, and term (one or three years), you gain a guaranteed resource and a significant price reduction compared to pricing for on-demand instances.

The Benefits of RIs

The primary advantage of Reserved Instances lies in their predictability. RI pricing is based on a fixed hourly or upfront cost for the reserved term. This allows you to lock in a fixed rate for your reserved instances, making cost forecasting and budgeting significantly easier. Additionally, with Reserved Instances, you gain guaranteed access to the specific instance types you need in your chosen Availability Zone throughout the reserved term. This eliminates the concern of interruptions that plagues Spot Instances. Pricing Models and Considerations for Reserved Instances. Pricing models within Reserved Instances are as follows:

  • All Upfront: Pay the entire cost for the reserved term upfront in exchange for the deepest discounts.
  • Partial Upfront: Pay a lower upfront cost with a slightly higher hourly rate compared to All Upfront.
  • No Upfront: Reserve instances with no upfront payment, but at a higher hourly rate than the All Upfront or Partial Upfront options.

The long-term commitment required by Reserved Instances is a key consideration. While it offers significant cost savings, it is not as flexible as compared to on-demand instances or Spot Instances. If your resource requirements change significantly during the reserved term, you risk underutilizing your reserved instances, potentially wasting money. Additionally, Reserved Instances limit your ability to scale resources up or down quickly based on changing workloads.

Reserved Instances are a perfect fit for mission-critical applications and workloads with consistent resource requirements. Predictable workloads benefit from the guaranteed availability and predictable pricing that RIs offer. Additionally, if you know your resource needs in advance and can commit to a term, Reserved Instances can deliver substantial cost reductions compared to on-demand pricing.

Primary Differences between Spot and Reserved Instances

Here is the detailed comparison of main distinctions between two options:

  Spot Instances Reserved Instances
Pricing Dynamic, based on supply and demand Fixed rate, based on term duration
Discount up to 90 % up to 72 %
Reliability Subject to termination with two-minute warning Availability guaranteed
Use cases Batch processing, data analysis, web scrapping Mission-critical applications, predictable workloads
Downtime Risk High, AWS can reclaim instances Low, no interruptions
Performing Implications Suitable for interruptible tasks, performance varies Ideal for consistent performance

Flexibility and Scalability

Also, if comparing Spot Instances and Reserved Instances, it’s important to understand how each type supports flexibility and scalability in different scenarios.

Flexibility is what you can be sure about Spot Instances at any time. Users can easily adjust bids and the number of instances based on workload requirements. This makes Spot Instances ideal for handling variable workloads, where the demand for resources can change rapidly. However, the main drawback is the potential for sudden termination, which can disrupt ongoing tasks. This risk can be mitigated using strategies such as checkpointing and automated instance replacement.

Reserved Instances offer less flexibility due to the commitment to a specific instance type and term. While this limits the ability to quickly scale resources up or down, it provides stability and predictability. Reserved Instances allow organizations to predict their resource usage and costs accurately, ensuring that critical applications have the necessary compute power without the risk of interruptions. However, scaling with Reserved Instances requires careful planning and may involve purchasing additional reserved instances or relying on on-demand instances for unexpected changes.

Choosing the Right Instance for Your Needs

When selecting between Spot Instances and Reserved Instances, carefully consider your specific needs and project goals. Several key factors influence the optimal choice:

  • Budget: Are you seeking maximum cost savings, or is predictable pricing more important?
  • Workload: Is your workload intermittent and tolerant of interruptions, or does it require consistent availability?
  • Predictability: Are your workload demands predictable, or do they fluctuate significantly?
  • Risk Tolerance: Are you comfortable with potential price fluctuations and interruptions, or do you prefer guaranteed availability and fixed pricing?

By evaluating these factors, you can determine which instance type aligns best with your requirements.

The choice between Spot Instances and Reserved Instances boils down to a balance of cost savings, predictability and flexibility. For workloads that can tolerate interruptions and have variable resource requirements, Spot Instances offer unbeatable cost savings (up to 90%). Alternatively, if guaranteed uptime and predictable resources are crucial for your workload, Reserved Instances provide a better fit. Their fixed costs offer stability and eliminate the need of constantly monitor bids for Spot Instances. Ultimately, the best choice depends on your specific needs and workload characteristics. Consider conducting a thorough cost analysis and exploring different approaches that leverage both Instances to optimize cost-efficiency and resource management.

The Complete Guide to Understanding AWS Enterprise Discount Program (EDP)

AWS EDP (Enterprise Discount Program) is a pricing program offered by Amazon Web Services (AWS) to help organizations save money on their cloud computing costs. It involves significant edp commitment and offers private pricing. It is designed for larger organizations with significant cloud usage, offering discounts based on the organization’s overall spend.

The program is important for organizations as it can help them reduce their cloud expenses and better manage their budget. It also allows organizations to plan for future growth and scale their cloud usage without worrying about unexpected costs, thanks to the provision of private pricing and the assurance of an edp discount.

Understanding AWS EDP

Unlike other AWS discount programs, such as AWS Reserved Instances and AWS Spot Instances, which offer discounts on specific types of instance usage, the EDP program offers discounts on a broader range of AWS services, including compute, storage, database, and networking services.

Additionally, the EDP program is specifically designed for large enterprises and organizations, whereas other AWS incentive plans may be available to all customers, making it an exclusive benefit for enterprise customers. The EDP program also requires customers to commit to a minimum level of usage over a period of time, whereas other programs do not have this requirement.

Key Benefits of AWS EDP

One of the key differences between AWS EDP and other cost reduction programs offered by AWS, such as AWS Savings Plans and Reserved Instances, is that EDP is specifically designed for large ventures. It requires a minimum commitment of $250,000 per year, making it more suitable for organizations with large-scale cloud computing needs. In contrast, AWS Savings Plans and Reserved Instances are available to all customers, regardless of their size or spending level.

Another key difference is that AWS EDP offers a tiered discount structure, with higher discounts being available to customers who commit to higher spending levels. This allows organizations to tailor their discount to their specific needs and usage patterns.

Eligibility and How to Sign Up

Eligibility:

To sign up for AWS, you must meet the following criteria:

  1. Be 18 years or older
  2. Have a valid credit card or bank account
  3. Have a valid phone number
  4. Have a valid government-issued ID
  5. Have a valid email address
  6. Be located in a country/region where AWS is available
  7. Have a basic understanding of cloud computing concepts, including AWS cloud spend management.

Step-by-step process for signing up:

  1. Go to the AWS website (aws.amazon.com) and click on “Create an AWS Account”.
  2. Enter your email address and create a password.
  3. Provide your personal information, including your name, address, and phone number.
  4. Enter your payment information, including your credit card or bank account details.
  5. Verify your identity by providing a valid government-issued ID.
  6. Choose a support plan (basic, developer, business, or business).
  7. Read and accept the AWS Customer Agreement and the AWS Service Terms.
  8. Click on “Create Account and Continue” to complete the sign-up process.

Role of AWS representatives in the process:

AWS representatives are available to assist and guide you through the sign-up process if needed, ensuring you make informed decisions about your aws spend and cloud cost. They can also provide information about AWS services, pricing, and support plans. However, the sign-up process can be completed independently without the assistance of an AWS representative.

Negotiating Your AWS EDP Agreement

Understanding your AWS usage is crucial before entering into negotiations for an EDP agreement, reflecting both edp discount and spend commitment considerations. This includes having a clear understanding of your current and projected usage of AWS services, as well as any specific requirements or needs your organization may have.

When negotiating a company price discount initiative agreement, there are several strategies that can help you secure more flexible terms and better pricing. These include:

  • Volume Commitments: AWS typically offers discounts based on the volume of services you commit to using. Negotiating higher volume commitments can lead to greater discounts and cost savings.
  • Long-Term Commitments: AWS also offers discounts for longer-term commitments, such as 1-year or 3-year contracts. If your organization is confident in its long-term usage of AWS services, negotiating a longer contract can result in significant spending reductions.
  • Customized Discounts: While AWS has standard discounts for different levels of volume and term commitments, they are often open to negotiating customized discounts based on your specific usage and needs. This can result in more favorable pricing for your organization, potentially including private pricing options.
  • Reserved Instances: AWS offers significant discounts for using Reserved Instances (RI) for certain services, which can lead to a lower overall cloud spend. Negotiating for a higher number of RIs can lead to additional expense savings, often through obtaining a better discount rate.

Aside from discounts, there are other benefits that can be negotiated in an EDP contract, including aws support levels and aws bill management features. These can include:

  • Support Services: AWS provisions various levels of support depending on the type of agreement. Negotiating for a higher level of support can provide your organization with more comprehensive technical assistance and faster response times.
  • Training and Education: AWS also offers training and education programs for its services, available through the AWS Marketplace. Negotiating for access to these programs can help your organization better utilize AWS and maximize its investment.
  • Service Credits: In the event of service disruptions or outages, AWS may offer service credits as compensation. Negotiating for a higher amount of service credits can provide your organization with added protection and compensation in the event of any disruptions.

Maximizing Value from AWS EDP

  1. Monitoring and managing AWS consumption: One of the most crucial aspects of maximizing value from AWS EDP is to continuously monitor and manage your usage. This involves tracking your resources, services, and workloads on AWS, and identifying any inefficiencies or areas where costs can be optimized.
  2. Utilizing AWS cost management tools for optimization: AWS enterprise supports a variety of cost management tools that can help you optimize your AWS deployment and reduce costs. These tools include AWS Cost Explorer, AWS Budgets, and AWS Trusted Advisor. By utilizing these tools, you can gain insights into your spending patterns and identify opportunities for cost savings.
  3. Keeping updated on AWS services and pricing models: AWS frequently introduces new services and updates its pricing models, which can impact your overall costs. It is important to stay updated on these changes and assess how they may affect your AWS usage and costs. This will help you make informed decisions about which services to use and how to optimize your usage.
  4. Leveraging reserved instances and savings plans: AWS packages discounted pricing for long-term commitments through reserved instances and savings plans, significantly impacting your cloud cost management strategy. By committing to a specific usage level for a period of time, you can save significantly on your AWS costs. It is important to regularly review your usage and adjust your reserved instances and savings plans accordingly to ensure maximum financial efficiency, enhance your AWS cloud spend.
  5. Implementing cost allocation and tagging strategies: By implementing cost allocation and tagging strategies, you can track and allocate costs to specific teams or projects within your organization. This not only helps with budgeting and cost management but also enables you to identify areas where you can optimize costs based on usage patterns.
  6. Implementing cost-saving best practices: There are several best practices for cost optimization on AWS that you can implement to save money. These include rightsizing your resources, using auto-scaling, optimizing storage, and using spot instances for non-critical workloads.
  7. Regularly reviewing and optimizing your architecture: As your usage and needs change, it is important to regularly review and boost your AWS architecture to ensure it is cost-effective. This involves identifying any unused or underutilized resources and making adjustments to your infrastructure to optimize costs.
  8. Partnering with an AWS Managed Service Provider (MSP): An AWS MSP can provide expertise and support in managing and optimizing your AWS operation and costs. They can help you implement best practices, monitor your cloud cost and aws spend, and make recommendations for cost optimization, allowing you to focus on your core business.
  9. Taking advantage of AWS training and certifications: AWS offers a variety of training and certification programs that can help you gain in-depth knowledge of AWS services and cost management best practices. By investing in training for your IT team, you can increase their skills and expertise in managing and improving your AWS usage and costs.
  10. Regularly reviewing and renegotiating your AWS Enterprise Discount Program (EDP) agreement: As your AWS application and needs evolve, it is important to regularly review and renegotiate your enterprise commitment agreement with AWS. This can help you ensure that you are getting the best value for your money and taking advantage of any new services or pricing models that may benefit your organization.

Conclusion

The AWS Enterprise Discount Program (EDP) presents a compelling opportunity for large organizations to optimize their cloud computing costs and strategically manage their cloud budget. By participating in the EDP, organizations can benefit from significant discounts tailored to their specific usage patterns and needs, fostering cost predictability and enabling effective budget planning.

The EDP’s tiered discount structure, requiring a minimum commitment, provides flexibility for organizations to scale their cloud usage efficiently while enjoying progressively higher discounts. Moreover, negotiating an EDP agreement involves strategic considerations such as volume commitments, long-term contracts, and customized discounts, allowing organizations to maximize their cost savings and operational efficiency within the AWS ecosystem.

To fully leverage the value of the AWS EDP, organizations should adopt proactive strategies for monitoring and optimizing their AWS consumption, utilizing cost management tools, and staying informed about AWS services and pricing models. Implementing best practices like leveraging reserved instances, implementing cost allocation strategies, and regularly optimizing cloud architecture can further enhance cost efficiency and drive value from the EDP.

In essence, by embracing the AWS EDP and adopting a proactive approach to cloud cost management, organizations can harness the full potential of AWS services while achieving significant spending reduction and optimizing their cloud investment for future growth and scalability.

Don’t miss out on this opportunity to reduce costs, increase efficiency, and scale with confidence. Contact CloudAvocado now on how to get started on your AWS EDP journey.

Let’s build your future in the cloud together.

Horizontal vs. Vertical Scaling: Key Differences and the Right Path for Your Business

In this article, we will discuss the importance of scaling in business growth and how it can help companies stay competitive in the market. We will also explore the key differences between horizontal and vertical scaling, and their respective benefits and drawbacks. Lastly, we will provide some tips on how businesses can effectively implement scaling strategies to support their growth.

Comparison of vertical and horizontal scaling

What is Scalability?

Scalability refers to the ability of a system, network, or process to handle an increasing amount of work or users in a reliable and efficient manner. It is a key characteristic of a system that allows it to adapt and grow without significant degradation in performance or stability. In other words, scalability ensures that a system can handle a larger workload or user base without crashing or slowing down. This is particularly important in modern technology, where the demand for resources and services can fluctuate greatly. A scalable system is able to seamlessly handle these fluctuations and continue to provide a high level of performance and availability.

Horizontal Cloud Scaling

Horizontal scaling, also known as scaling out, is a technique used to increase the capacity of a system by adding more resources rather than upgrading existing ones. This is done by adding more machines or servers to handle more power of the workload, thus distributing the load across multiple nodes or systems.

Horizontal scaling refers to cloud computing and can help improve performance, reliability, and availability of a system. It is a cost-effective way to handle increasing demands and can be easily implemented by adding more resources as needed.

Example of horizontal scaling

Explanation of Horizontal Scaling 

Horizontal scaling is a method of increasing the capacity of a target resource in a system by adding more identical resources in parallel. This means that instead of increasing the power of a single resource, multiple resources are added to work together and handle a larger workload.

In horizontal scaling, the workload is distributed across multiple servers or machines, allowing for increased performance, reliability, and availability. This can be contrasted with vertical scaling, where the capacity of a single node or resource is increased by adding more resources to it.

One of the key advantages of horizontal scaling is its ability to handle sudden increases in demand. If a website or application experiences a sudden surge in traffic, additional resources can be quickly added to handle the increased load, without causing downtime or performance issues.

Another benefit of horizontal scaling is its cost-effectiveness. Instead of investing in expensive, high-powered hardware, organizations can add more affordable, lower-powered resources as needed. This also makes it easier to scale resources up or down depending on current demand, reducing unnecessary costs when you’re just starting.

However, horizontal scaling also has some limitations. It may require more complex configuration and management compared to vertical scaling. Additionally, not all applications or systems are designed to be horizontally scaled, so it may not be a viable option for all situations.

Overall, horizontal scaling is a popular choice for organizations looking to increase their system’s capacity and handle sudden spikes in demand. It offers benefits such as improved performance, scalability, and cost-effectiveness, but also requires careful planning and implementation to be effective.

Advantages of Horizontal Scaling

  • Increased capacity: One of the main advantages of using a server cluster is that it can handle a larger volume of traffic and data compared to a single server. This is because a cluster can distribute the workload among multiple servers, allowing for increased capacity and performance. 
  • Fault tolerance: Server clusters are designed to be fault-tolerant, meaning they can continue to operate even if one or more servers experience issues. This is achieved through the use of specialized software and hardware that allows the cluster to detect and recover from failures, minimizing downtime.
  • Cost-effectiveness: Server clusters can be a cost-effective solution for businesses as they allow for the distribution of workload among multiple servers, reducing the need for expensive high-end servers. This also means that if one server needs to be upgraded or replaced, it can be done without disrupting the entire system.

Implementation strategies 

  • Load balancing is a technique used to distribute the workload evenly across multiple nodes in a network. This can be implemented by using a load balancer, which acts as a traffic controller and distributes incoming requests to different servers based on their current load and availability.
  • Clustering is a method of grouping multiple servers to act as a single system. This is achieved by using clustering software that allows the servers to communicate with each other and work together to perform a task. This helps in achieving high availability, scalability and fault tolerance.
  • Distributed computing is a model in which a task is divided into smaller subtasks and distributed across multiple nodes in a network. These nodes then work together to complete the task, thereby reducing the overall processing time. This approach is ideal for handling large and complex tasks that require significant computing power.

Real-world use case examples 

  1. Social Media Platforms: Popular social media platforms like Facebook, Twitter, and Instagram use horizontal scaling to handle the millions of users accessing their platforms simultaneously. By adding more servers, they are able horizontally scale to handle the increased demand and keep the platform running smoothly.
  2. E-commerce Websites: Online retailers like Amazon and eBay use horizontal scaling to handle the large volume of transactions and visitors to their websites. By adding more servers, they can handle the increased traffic and ensure fast and reliable service for their customers.
  3. Cloud Computing: Cloud computing providers like Amazon Web Services and Microsoft Azure use horizontal scaling to handle the growing demand for their services. By adding more servers and resources, they can handle the increased number of customers and provide reliable and scalable services.
  4. Video Streaming Services: Services like Netflix and Hulu use horizontal scaling to deliver high-quality streaming to their millions of subscribers. By adding more servers, they can handle the large amount of data transfer required for streaming videos to multiple users at the same time.
  5. Online Gaming: Online gaming companies like Blizzard and Riot Games use horizontal scaling to handle the large number of players accessing their games simultaneously. By adding more servers, they can ensure a smooth and uninterrupted gaming experience for their players.

Vertical Cloud Scaling 

Vertical scaling, also known as “scaling up” or “scaling vertically”, refers to the process of increasing the resources (such as CPU, memory, and storage) of a single server or machine. This is typically done by upgrading the hardware components of the server, such as adding more RAM or a faster CPU.

Vertical scaling means it is often used to improve the performance and capacity of a single server, for example allowing it to handle more users or process more data. It is usually a more cost-effective solution than horizontal scaling, which involves adding more servers to a system.

Example of vertical scaling

Explanation of Vertical Scaling 

Vertical scaling refers to increasing the capacity or performance of a single server or computer system. It involves adding more resources such as RAM, CPU, storage, and bandwidth to the existing server or system to handle increased workload and traffic.

Vertical scaling is typically done by upgrading the hardware components of a single machine or server, such as adding more RAM or replacing the existing CPU with a more powerful one. This allows the system to handle a larger amount of data and perform more complex tasks at a faster rate.

One of the main advantages of vertical scaling to point out is that it is relatively easy to implement, as it only requires adding more resources to an existing system. This can be done by simply upgrading the hardware or by migrating to a more powerful server.

However, there are also limitations to making vertical scale. Eventually, a server or system will reach its maximum capacity and resource usage and can no longer be scaled up. At this point, businesses may need to consider other options such as horizontal scaling, which involves adding more servers to distribute the workload.

In summary, vertical scaling is the process of increasing the performance and capacity of a single server or system by adding more resources. It is a simple and efficient way to handle increased workload and can be a cost-effective solution for businesses. However, it also has its limitations, and businesses may need to explore other options as their needs continue to grow.

Advantages of Vertical Scaling

  1. Simplicity: Vertical scaling involves increasing the resources of a single server, such as adding more CPU, memory, or storage. This makes it a simpler and more straightforward process compared to horizontal scaling, which requires adding multiple servers.
  2. Fewer synchronization issues: With vertical scaling, all the resources are located on a single server, which reduces the need for synchronization between different servers. This minimizes the risk of data inconsistencies and ensures smooth operation of the application.
  3. Scalability for certain applications: Vertical scaling is more suitable for applications that require high processing power, such as databases, analytics, and scientific computing. These applications can benefit from the increased resources of a single server, without the need for complex clustering or load balancing.

Implementation strategies 

  • Upgrading hardware: This involves replacing old hardware components with newer and more powerful ones. This can include upgrading the processor, memory, storage, and network equipment. Upgrading hardware can improve system performance, increase storage capacity, and allow for more efficient resource utilization and allocation.
  • Optimizing software: Software optimization involves streamlining and improving the performance of existing software. This can include optimizing code, removing unnecessary features, and improving data processing algorithms. Optimizing software can improve system speed and efficiency, reduce resource usage, and enhance overall system performance.
  • Virtualization: Virtualization involves creating virtual versions of hardware and software resources. This allows for better utilization of hardware resources, as multiple virtual machines can run on a single physical server. Virtualization can also improve system scalability and flexibility, as resources can be easily allocated and reallocated as needed.

Vertical scaling examples 

  1. Increasing the processing power of a server: One common example of vertical scaling is increasing the processing power of a server. This can involve adding more powerful CPUs, increasing the RAM, or upgrading to a higher tier of hardware. This allows the server to handle a larger volume of requests and improve overall performance.
  2. Upgrading computer components: When a computer starts to feel sluggish or cannot run certain programs, users may choose to upgrade its components through vertical scaling. This can include adding more RAM, upgrading the CPU, or installing a more powerful graphics card. These upgrades can significantly improve the computer’s performance and allow it to handle more demanding tasks.
  3. Scaling up a virtual machine: In cloud computing, vertical scaling refers to up a virtual machine involves increasing its resources, such as CPU, RAM, and storage, to handle increased workloads. This allows the virtual machine to handle more tasks and users without experiencing performance issues.
  4. Expanding database capabilities: As a business grows, its database needs may also increase. Vertical scaling can be used to expand a database’s capabilities by adding more storage, increasing the number of concurrent connections, and improving processing power. This allows the database to handle larger amounts of data and improve its performance.
  5. Upgrading a smartphone’s hardware: When a smartphone starts to feel slow or cannot run certain apps, users may choose to upgrade its components through vertical scaling. This can include increasing the RAM, storage, or upgrading to a newer and more powerful model. These upgrades can improve the phone’s performance and allow it to handle more demanding tasks.

Factors Influencing the Choice 

  • Compatibility with existing systems and software;
  • Security and data privacy concerns;
  • Availability of support and maintenance services;
  • Integration with other tools and platforms;
  • User interface and ease of use;
  • Performance and speed requirements;
  • Reliability and uptime guarantees;
  • Flexibility and customization options;
  • Vendor reputation and customer reviews;
  • Regulatory compliance requirements;
  • Migration and transition plans;
  • Training and learning curve for employees;
  • Contract terms and service level agreements;
  • Industry-specific needs and regulations;
  • Geographic location and data sovereignty laws.

Best Practices 

  • Conduct thorough performance analysis: Before implementing any scaling strategies, it is important to thoroughly analyze the current performance of your system. This will help identify any bottlenecks or areas that may need improvement before scaling can be effective.
  • Consider scalability from the outset: When designing and building your system, it is important to keep scalability in mind from the beginning. This means using technologies and architectures that can easily accommodate growth without major reworking.
  • Implement monitoring and automation: Monitoring the performance of your system is crucial in identifying when scaling is needed. Automation tools can also help automatically scale resources up or down based on predefined thresholds, reducing the need for manual intervention.
  • Regularly review and reassess scaling strategy: As your system and business needs evolve, it is important to regularly review and reassess your scaling strategy. This will ensure that it remains effective and efficient in meeting the demands of your growing user base.

Conclusion 

Horizontal cloud scaling, also known as scaling out, involves adding more machines or nodes to a system to increase its capacity. This is achieved by distributing the workload across multiple machines, allowing for better performance and handling of increased traffic.

Vertical cloud scaling, also known as scaling up, involves upgrading the existing hardware or infrastructure to increase its capacity. This is achieved by adding additional machines or more resources, such as memory, CPU, or storage, to an existing machine.

Both, horizontal scalability and vertical scaling have their own advantages and disadvantages. Horizontal scaling allows for better fault tolerance and scalability, as the workload is distributed across multiple machines. However, it requires a more complex system architecture and may not always result in a linear increase in performance.

Vertical scaling, on the other hand, may be more cost-effective and easier to implement initially. However, it may not be as scalable in the long run as horizontal, and can result in a single point of failure if the upgraded hardware fails.

Choosing the right vertical scaling and horizontal out strategy depends on various factors, such as the type of web service or application, expected growth, budget, and existing infrastructure. It is important for businesses to carefully evaluate their needs and consider the trade-offs before deciding on a scaling strategy.

In addition, businesses should also consider implementing a hybrid approach, where both horizontal and vertical scaling are used together. This allows for a more flexible and robust system, as both strategies complement each other.

Other important considerations for businesses include regularly monitoring and testing their scaling strategy to ensure it is meeting their needs. They should also be prepared to adapt and adjust their strategy as their needs and requirements change.

In conclusion, choosing the right scaling strategy is crucial for businesses to ensure their systems can handle increased traffic and maintain optimal performance. It requires careful evaluation and consideration of various factors, and businesses should also be prepared to adapt and adjust their strategy as needed. By choosing the right scaling strategy, businesses can ensure their systems are scalable, reliable, and can support their growth and success.

FAQs

What are the challenges or limitations of horizontal scaling? 

  • There is a limit to how much an application can be horizontally scaled, as it requires additional hardware and resources to add more servers.
  • There may be issues with data consistency and synchronization across multiple servers, which can affect the performance and reliability of the application.
  • Not all applications are designed to be horizontally scalable, and it may require significant changes to the architecture or codebase.
  • Load balancing and managing multiple servers can be complex and requires additional resources and expertise.
  • It may not be cost-effective for smaller applications, as the cost of hardware and maintenance can add up quickly.

What are the challenges or limitations of vertical scaling? 

  • There is a limit to how much an application can be vertically scaled, as the resources of a single server are finite.
  • It can be challenging to upgrade or replace hardware in a live production environment, as it may cause downtime or disruption to the application.
  • There may be compatibility issues when upgrading to newer or different hardware components.
  • It may not be cost-effective in the long run, as the cost of high-end hardware can be expensive.

Is it cheaper to scale horizontally or vertically?  

The cost of vertical and horizontal scaling depends on the scale based on various factors, such as the size and complexity of the application, the resources needed, and the availability of hardware.

So what are the key differences, shortly?

So let’s sum up everything based on key differences. Horizontal scaling can be more cost-effective in the long run than vertical scaling, as it allows for adding resources as needed, rather than investing in expensive high-end hardware for vertical scaling. However, this may not always be the case, and the most cost-effective option will vary depending on the scale of web server, the specific application and its requirements.

FinOps Maturity Model: tracking your cost optimization progress

In today’s rapidly evolving business landscape, organizations are increasingly adopting FinOps practices to optimize their cloud costs and enhance financial operational efficiency. The FinOps Maturity Model provides a framework to assess an organization’s level of maturity in various FinOps capabilities, enabling them to identify areas for improvement and chart a course towards achieving their financial goals. This article explores the concept of the FinOps Maturity Model and highlights its key characteristics and guidelines.

Iterative Nature of FinOps

The practice of FinOps is inherently iterative, emphasizing continuous improvement and learning. It recognizes that the maturity of any process, functional activity, capability, or domain improves with repetition. By embracing a “Crawl, Walk, Run” approach, organizations can start small and gradually expand their FinOps initiatives as the business value justifies the maturing of specific activities.

Crawl: The Starting Point

At the Crawl stage, organizations have limited reporting and tooling capabilities. Measurements provide some insights into the benefits of maturing the capability, and basic key performance indicators (KPIs) are established to gauge success. Processes and policies are defined, but may not be consistently followed across all teams. The focus is often on addressing low-hanging fruit and initiating resource-based commitments. Allocating at least 50% of resources and achieving a forecast spend to actual spend accuracy variance of 20% are indicative goals at this stage.

Walk: Building Momentum

In the Walk stage, the FinOps capability is understood and adopted within the organization. While some difficult edge cases may be identified, the decision to address them might be deferred. Automation and processes cover a significant portion of the capability requirements, and efforts are made to estimate and resolve the more challenging edge cases. Medium to high goals/KPIs are established to measure success, emphasizing progress toward financial optimization. Allocating at least 80% of resources, achieving a forecast spend to actual spend accuracy variance of 15%, and improving resource-based commitments coverage to around 70% are representative goals at this stage.

Run: Striving for Excellence

The Run stage signifies the highest level of maturity, where the FinOps capability is fully understood and followed by all teams across the organization. Difficult edge cases are actively addressed, and automation is the preferred approach for achieving efficiency and accuracy. Very high goals/KPIs are set to measure success, aiming for exceptional financial optimization. Organizations at this stage should be able to allocate over 90% of their resources, attain a forecast spend to actual spend accuracy variance of 12%, and achieve approximately 80% coverage in resource-based commitments.


chart self reported finops maturity level
Self reported maturity level according to survey from State of FinOps by FinOps Foundation

Business Value as the Driving Force

It is important to note that the goal of achieving a “Run” maturity level in every capability should not be the sole focus for organizations. The FinOps Principles emphasize that business value should drive decision making. Instead, organizations should prioritize maturing the capabilities that provide the highest business value. For example, if a capability is meeting the measurement of success, efforts should be directed toward other FinOps capabilities that can yield immediate benefits.

To assess the state of an organization’s FinOps capabilities, the maturity designations of Crawl, Walk, and Run serve as general guidelines. They allow organizations to identify their current level of operation and pinpoint areas for progression. The development of a FinOps Framework Assessment, along with the use of rubrics, provides a convenient shorthand to communicate effectively and gauge maturity.

Role of Maturity model 

The FinOps Maturity Model offers organizations a structured approach to continuously improve their financial operational practices. By following the “Crawl, Walk, Run” progression, organizations can start small, learn from their actions, and expand their FinOps initiatives in a manner that aligns with business value. Prioritizing capabilities that yield the highest value while focusing on achieving the outcomes of FinOps principles will enable organizations to optimize their cloud costs, improve operational efficiency, and maximize the benefits of FinOps practices.

Capabilities of FinOps: effective cloud cost management

Cloud computing has revolutionized the way businesses operate, providing scalability, flexibility, and cost-efficiency. However, managing cloud costs can be a complex endeavor without proper oversight and control. This is where FinOps (Financial Operations) comes into play. FinOps is a practice that combines financial management principles with cloud operations to optimize costs and drive value from cloud investments. To effectively implement FinOps, organizations need to leverage various capabilities or functional areas of activity. Let’s explore these FinOps capabilities and understand how they contribute to successful cloud cost management.

Cost Allocation (Metadata & Hierarchy)

Cost Allocation is a fundamental practice in FinOps that involves dividing up a consolidated invoice or bill among responsible parties. By leveraging metadata and hierarchy, organizations can allocate costs to specific departments, teams, or products. This capability ensures transparency and accountability, better cost tracking, identification of cost drivers, and the ability to optimize spending by aligning costs with business units.

Data Analysis and Showback

Organizations need to identify opportunities for cost optimization, such as eliminating underutilized resources, optimizing service usage, or adopting more cost-efficient alternatives. This requires creating near real-time reporting mechanisms. This enables stakeholders to understand total costs associated with specific business entities, identify opportunities for cost avoidance, and track key performance indicators (KPIs). These insights enable informed decision-making and drive cost optimization strategies. 

Managing Anomalies

Detecting, identifying, clarifying, alerting and managing unexpected events promptly is crucial.. By proactively addressing anomalies, organizations can mitigate financial risks, optimize spending, and prevent budget overruns.

Managing Shared Costs

Cloud costs are often shared across multiple products, departments, and teams. Managing shared costs involves appropriately splitting these expenses and building a comprehensive picture of how resources are utilized across the organization. This capability enables organizations to optimize cost allocation and gain insights into cost drivers within different business units, identify cost-sharing opportunities, and ensure fair distribution of expenses.

Forecasting 

Effective budget planning and investment decisions require forecasting. Organizations need to understand how changes in cloud infrastructure and application lifecycles can impact budgets. By leveraging forecasting capabilities, organizations can anticipate cost fluctuations, allocate resources effectively, and make informed financial decisions.

Budget Management

Organizations rely on budgets to guide strategic decisions, operational planning, and investments. Budget management capabilities help organizations align their financial objectives with cloud operations, ensuring cost control and resource optimization.

Workload Management & Automation

By optimizing workload scheduling and leveraging automation, organizations can reduce the number of idle resources, minimize costs, and enhance overall operational efficiency.

Managing Commitment-Based Discounts

Managing commitment-based discounts requires understanding the intricacies of your cloud service provider tools and FinOps platforms. By effectively planning, managing, and leveraging commitment discounts  constructs, organizations can optimize costs and maximize the value derived from cloud investments.

Resource Utilization & Efficiency

Maximizing value derived from your cloud investment involves creating mechanisms to collect and analyze cost and usage data over time. By implementing manual and automated policies, organizations can optimize resource utilization and ensure that cloud services are used efficiently across their infrastructure.

Measuring Unit Costs

Measuring unit economic metrics allows organizations to determine the revenue generated by a single unit of their business and the associated costs.  Understanding the business value of their cloud spend helps to make data-driven decisions to optimize costs.

Data Ingestion & Normalization

Processing and transforming data sets related to cloud cost and usage,  organizations can generate accurate insights and drive informed decision-making.

Chargeback & Finance Integration

By integrating financial processes and accountability mechanisms, organizations can foster cost-consciousness and align spending with business goals.

Onboarding Workloads

The onboarding workloads focuses on establishing a streamlined processes to onboard both existing and new applications to the cloud. This process involves assessing financial viability and technical feasibility while implementing FinOps best practices from the outset. By integrating cost considerations into the onboarding process, organizations can ensure cost-efficient cloud adoption.

Establishing FinOps Culture

Creating a FinOps culture is about instilling a sense of accountability and ownership within organizations. This capability involves educating stakeholders on the importance of cloud cost management and leveraging FinOps practices to drive business value. By establishing a FinOps culture, organizations can accelerate their journey towards optimized cloud costs and enhanced financial performance.

FinOps & Intersecting Frameworks

This capability explores the intersection between FinOps and other existing IT and financial standards within organizations. As cloud adoption increases, it becomes essential to align FinOps practices with established frameworks. By understanding these intersections, organizations can address challenges, ensure compliance, and optimize cloud cost management within their existing processes.

Cloud Policy & Governance 

Policy and governance capabilities provide a framework for defining statements of intent and ensuring adherence to cloud cost management practices. By establishing policies and governance mechanisms, organizations can enforce guidelines, maintain financial control, and mitigate risks associated with cloud costs.

FinOps Education & Enablement

FinOps education and enablement capabilities aim to increase the proficiency and adoption of FinOps practices within organizations. By providing comprehensive training and resources, organizations can empower individuals and teams to leverage FinOps principles effectively, driving cost optimization and value creation.

Establishing a FinOps Decision & Accountability Structure 

Defining a FinOps decision and accountability structure involves assigning roles, responsibilities, and activities to bridge operational gaps in cloud cost management. This capability ensures that organizations have the necessary resources and processes in place to address unexpected challenges and take proactive action when needed.

Summary

This range of FinOps capabilities plays a vital role in optimizing cloud costs and maximizing the value derived from cloud investments. By leveraging these capabilities, organizations can achieve greater cost visibility, financial control, and overall operational efficiency in their cloud environments. So far we discovered that Domains are the main areas of FinOps and Domain has a list of Capabilities included, which when properly implemented enables FinOps processes. Our next article will explain the way you can set your cost optimization goals and track your FinOps adoption progress with Maturity Model.

FinOps cloud cost optimization framework: Domains overview

A FinOps Domain is a specific area or scope within an organization where financial operations (FinOps) practices are applied. It could be a department, a project, or a product line. The main goal of having FinOps Domains is to bring financial accountability and optimization to different parts of an organization’s operations. When adopting FinOps, every organization engages in activities across various FinOps Domains, each representing a distinct area of focus and expertise. These Domains are made up of FinOps Capabilities, which outline the specific functional activities associated with that Domain. In our upcoming articles, we’ll cover the six components of a cloud cost optimization framework, starting from FinOps Domains.

Domain Model

The FinOps Domains collectively encompass the Capabilities that organizations must employ in their FinOps practices. While each organization will utilize every Domain, the specific mix of capabilities within each Domain may vary based on the organization’s level of FinOps maturity.

The Domains are interconnected, providing a high-level overview of the functional activities necessary for running a FinOps practice. Implementing these Domains yields tangible outcomes such as cost and usage reporting, improved performance, and the identification of new opportunities that inform subsequent iterations through the FinOps Phases.

Domains of FinOps framework

Understanding Cloud Usage and Cost

Within this Domain, organizations strive to gather comprehensive information about their cloud usage and costs, normalize the data, and make it accessible for review by relevant stakeholders. This includes circulating the data to personas involved in other Domains.

  • Measuring Unit Costs
  • Managing Shared Cost
  • Managing Anomalies
  • Forecasting
  • Data Ingestion & Normalization
  • Cost Allocation (Metadata & Hierarchy)
  • Data Analysis and Showback

By gaining a comprehensive understanding of cloud usage and costs, organizations can effectively optimize their cloud expenses. This Domain enables organizations to identify patterns, trends, and anomalies in their usage and cost data. By normalizing and analyzing this information, organizations can make informed decisions about resource allocation, identify areas of inefficiency, and optimize their cloud spend. The ability to accurately allocate costs and provide detailed usage reporting also promotes transparency and accountability within the organization.

Performance Tracking & Benchmarking

This Domain involves setting and mapping usage and cost to budgets, utilizing historical data for forecasting, and establishing and measuring key performance indicators (KPIs) and benchmarks.

  • Resource Utilization & Efficiency
  • Measuring Unit Costs
  • Managing Commitment Based Discounts
  • Managing Anomalies
  • Forecasting
  • Budget Management

Tracking performance metrics and benchmarking against established targets and industry standards is crucial for cloud cost optimization. This Domain allows organizations to measure resource utilization and efficiency, identify areas of overprovisioning or underutilization, and make data-driven decisions to optimize their cloud spend. By aligning usage and costs with budgets and establishing KPIs, organizations can proactively monitor their cloud costs, identify deviations, and take corrective actions in real-time, ensuring efficient resource allocation and cost control.

Real-Time Decision Making

This Domain focuses on enhancing stakeholder enablement by curating data in stakeholder-specific contexts, improving decision velocity iteratively, and aligning organizational processes with the realities of operating in the cloud.

  • Measuring Unit Costs
  • Managing Anomalies
  • Establishing a FinOps Decision & Accountability Structure
  • Data Analysis and Showback

Real-time decision making is essential for agile cost optimization in the cloud. This Domain enables organizations to curate and analyze data in real-time, empowering stakeholders to make informed decisions that align with the realities of cloud operations. By establishing a FinOps decision and accountability structure, organizations can streamline decision-making processes, improve response times to cost-related issues, and optimize cloud costs based on up-to-date information. This Domain also fosters a culture of continuous improvement, enabling organizations to adapt their strategies and tactics as needed to achieve optimal cost efficiency.

Cloud Rate Optimization

In this domain, organizations define pricing model goals, make pricing adjustments based on historical data, leverage commitment-based discounts, and manage pricing aspects of cloud services.

  • Intersection of Cloud FinOps & Sustainability
  • Managing Commitment Based Discounts
  • Data Analysis and Showback

Optimizing cloud rates and pricing models is a key aspect of cloud cost optimization. Within this Domain, organizations can define their pricing goals, leverage historical data to make pricing adjustments, and strategically utilize commitment-based discounts to maximize cost savings. By effectively managing the pricing aspects of the cloud services they utilize, organizations can ensure they are getting the most value for their investment, optimize cost structures, and align their pricing models with their specific business needs.

Cloud Usage Optimization

This Domain focuses on matching running cloud resources with the actual demand of workloads at any given time. It involves predictive rightsizing, workload management, automation, resource utilization, and techniques to optimize resource usage.

  • Intersection of Cloud FinOps & Sustainability
  • Workload Management & Automation
  • Resource Utilization & Efficiency
  • Onboarding Workloads
  • Data Analysis and Showback

Aligning cloud resource usage with actual demand is critical for cost optimization. This Domain enables organizations to identify opportunities to optimize resource allocation, automate workload management, and rightsize their resources based on predicted usage patterns. By continuously monitoring and optimizing resource utilization and efficiency, organizations can avoid unnecessary costs associated with idle or underutilized resources. Techniques such as workload automation and onboarding can further optimize cloud usage, ensuring resources are provisioned and deprovisioned as needed, resulting in cost savings and improved operational efficiency.

Organizational Alignment

This Domain entails managing cloud usage in alignment with other IT Finance activities, integrating FinOps capabilities into existing organizational processes, units, and technology.

  • Intersection of FinOps & ITSM
  • Intersection of FinOps & Security
  • Intersection of FinOps & ITFM/TBM
  • Intersection of FinOps & ITAM/SAM
  • Cloud Policy & Governance
  • Managing Shared Cost
  • Managing Commitment Based Discounts
  • Establishing FinOps Culture
  • FinOps Education & Enablement
  • Establishing a FinOps Decision & Accountability Structure
  • Chargeback & Finance Integration
  • Budget Management
  • FinOps & Intersecting Frameworks

Aligning cloud usage and FinOps capabilities with other IT finance activities and existing organizational processes is vital for cost optimization. This Domain enables organizations to integrate FinOps practices with IT service management, security processes, financial management, and other frameworks. By establishing effective cloud policy and governance, managing shared costs, and integrating FinOps into existing organizational units, organizations can streamline financial processes, enhance cost visibility, and ensure proper financial control over cloud usage. This alignment also facilitates effective communication and collaboration between IT and finance teams, leading to better decision-making and cost optimization outcomes.

Summary

By leveraging the capabilities within each FinOps Domain, organizations can achieve significant cost savings, improved resource utilization, and enhanced operational efficiency in their cloud environments. These Domains provide a structured approach to cloud cost optimization, allowing organizations to systematically address various aspects of their cloud usage and expenditure and make data-driven decisions to optimize their cloud costs while maximizing business value. FinOps Domains enable organizations to harness the full potential of cloud computing while maintaining financial discipline and maximizing value. In the next article, we are going to talk about Capabilities that each Domain includes.

AWS Free Tier: an overview of capabilities and limitations

AWS Free Tier is a program that allows users to explore and experience a range of AWS services at no cost, up to specified usage limits. This article will provide a comprehensive guide on how to effectively use it. We will cover its purpose, terms of use, supported services, and highlight the benefits it offers to users.

How it works

The AWS Free Tier provides customers with the opportunity to try out some of the AWS services free of charge, enabling them to gain hands-on experience with cloud computing. It consists of three offerings:

  • The 12-month Free Tier allows free usage of services within set limits for one year from the date of account activation. 
  • The Always Free offer enables ongoing usage within specific limits as long as the user maintains a valid AWS account. 
  • Short term Trials provide free usage for a limited period or up to a one-time limit, depending on the selected service.

Terms of Use

To qualify for the AWS Free Tier, users need to have an AWS account. It is available to various customer types, from students and small businesses to large enterprises. However, if an account is linked to an AWS Organization, only one account within the organization can benefit from the Free Tier. The usage of AWS services across all accounts within the organization is aggregated to determine eligibility for the Free Tier. If the free tier limits are exceeded or the user is deemed ineligible, standard pay-as-you-go rates will apply. As part of the AWS Free Tier, you can get started with EC2 for free. 

List of services included in AWS Free Tier

aws free tier limits table

AWS Free tier Limitations

Pay attention – not all AWS services are free. There are no guard rails and you need to remember that your access to services is not restricted by the AWS Free Tier. Moreover, services at the Free Tier have usage limits. You will be charged at standard rates, if exceeding those limits. Also, make sure that services you intend to use are covered and has usage limits applicable to your goals, in order to avoid unexpected charges.

Services not available in the AWS Free Usage Tier

  • Reserved Instances
  • AWS Support subscription
  • Route 53 (still need to pay for hosted availability zones and domains)
  • EC2 is limited to a micro instances
  • Amazon EKS
  • Many of the amounts are high enough that you can get locked in — like 50GB Glacier storage or 1M calls/month to API Gateway
  • Free tier is not allowed to be used for for cryptomining
  • Limited availability of AMIs
  • Amazon S3 RRS storage.

Benefits of AWS Free Tier

  1. Exploration and Learning: Users can experiment some of AWS services, gaining hands-on experience and exploring different use cases without incurring costs.
  2. Cost-effective Development and Testing: The Free Tier allows users to develop and test applications, proof of concepts, and prototypes without the need for upfront investments.
  3. Cost Management and Control: The Free Tier helps users understand the costs associated with different services, enabling them to optimize usage and control expenses.

Conclusion

As you see, despite its limitations AWS Free Tier provides a valuable opportunity for users to explore and leverage the benefits of cloud computing services without incurring initial costs. By understanding the terms of use, exploring the supported services, and taking advantage of the benefits it offers, users can make the most of their cloud journey, empowering themselves for innovation and growth.

5 ways to get your AWS cost estimate

Estimating AWS costs is crucial for effective budget planning, cost optimization, and decision-making. By getting an estimate of the costs associated with running your AWS resources, you can allocate your budget wisely, identify areas for cost optimization, compare different resource configurations, forecast future expenses, and make informed decisions. These estimates provide valuable insights into the financial impact of your AWS usage, enabling you to optimize costs, ensure budgetary alignment, and drive accountability within your organization. In this article, we will explore the various tools available for estimating AWS costs.

Where to look for AWS cost estimate?

There are several ways to get AWS cost estimate for your resources. Here are the options:

AWS Cost Explorer

AWS Cost Explorer is a web-based tool provided by AWS that allows you to visualize, analyze, and forecast your AWS costs and usage. It provides pre-built reports, interactive charts, and cost breakdowns, helping you understand your costs at a high level.

It is useful for gaining high-level insights into your AWS costs and usage trends. It provides visualizations and reports that can help you understand how costs are distributed across different services, regions, or tags. It can be used for budget planning, identifying cost anomalies, and analyzing cost drivers.

Pros:

  • User-friendly interface with pre-built reports and interactive charts.
  • Ability to drill down into cost details and filter data based on various dimensions.
  • Cost forecasting feature to estimate future costs.

Cons:

  • Limited granularity in some reports, making it difficult to get detailed insights for specific resources.
  • It may take a few hours for new cost data to be available in Cost Explorer.
  • Advanced cost optimization features are not available within the tool.

AWS Pricing Calculator

The AWS Pricing Calculator is an online tool that allows you to estimate the cost of using AWS services based on your expected usage patterns. You can select specific services, configure resource details, and input usage quantities to generate an estimated monthly cost. It also helps you compare costs across different services, regions, and pricing models to make informed decisions during the planning stage.

Pros:

  • Ability to select specific services and configure resource details for accurate cost estimation.
  • Options to customize usage patterns, such as choosing reserved or on-demand instances, data transfer volumes, and storage sizes.
  • Provides an estimated monthly cost based on your inputs.

Cons:

  • Requires manual input and configuration, which may be time-consuming for complex architectures.
  • Limited to estimating costs for specific services and does not provide a comprehensive view of overall AWS costs.
  • May not reflect real-time pricing changes or discounts.

AWS Simple Monthly Calculator

The AWS Simple Monthly Calculator is a basic online tool that helps you estimate the cost of running a specific set of AWS resources. The AWS Simple Monthly Calculator is helpful when you have a specific set of AWS resources in mind and want to estimate the monthly costs of running them. It allows you to configure various resource types and quantities to get a detailed estimate. You can select various input details such as instance types, storage sizes, and data transfer to get an estimated monthly cost.

Pros:

  • Provides a granular cost estimate by allowing you to specify resource details.
  • Supports a wide range of AWS services and provides options for storage, compute, database, and networking resources.
  • Can help in comparing costs between different resource configurations.

Cons:

  • Requires manual input for each resource, which can be time-consuming for complex architectures.
  • Limited to estimating costs for specific resources and does not provide a comprehensive view of overall AWS costs.
  • May not reflect real-time pricing changes or discounts.

AWS Cost and Usage Reports

AWS Cost and Usage Reports provide detailed billing data in a machine-readable format. You can enable this feature to get a comprehensive breakdown of your AWS costs, including resource-level details. You can export this data and perform custom analysis or use third-party tools to generate cost estimates.

Pros:

  • Provides detailed billing data in a machine-readable format for custom analysis.
  • Offers granular visibility into costs at the resource level, allowing for deeper insights.
  • Enables integration with third-party cost management tools for advanced analysis and optimization.

Cons:

  • Requires additional effort to set up and configure the reports.
  • The data may not be readily available and may take a few hours to generate.
  • Requires technical expertise to process and analyze the data effectively.

Third-party tools

There are various third-party tools available that provide more advanced cost management and optimization capabilities for AWS. Some popular options include CloudCheckr, CloudHealth by VMware, and AWS Cost Management partners. These tools often offer additional features beyond getting aws cost estimate, such as cost optimization recommendations and budgeting. Third-party cost management tools are beneficial when you need more advanced cost optimization features, customized reporting, or integration with other systems. They provide comprehensive cost management capabilities in comparison to standard services.

Pros:

  • Advanced cost optimization recommendations to identify potential cost-saving opportunities.
  • Customizable dashboards and reports for detailed cost analysis.
  • Integration with other cloud platforms or business systems for holistic cost management.

Cons:

  • Additional cost for using third-party tools.
  • Learning curve to understand and leverage the tool’s features effectively.
  • Integration and setup may require additional effort.

Summary

Consider your specific requirements, level of granularity needed, and the complexity of your AWS infrastructure when choosing the most suitable tool for estimating your AWS costs.

By having accurate AWS cost estimate, you can effectively manage your cloud costs, optimize resource allocation, and make informed decisions that align with your budgetary goals and business objectives. You should consider your specific requirements, level of granularity needed, and the complexity of your AWS infrastructure when choosing the most suitable tool for estimating your AWS costs. Remember that cost estimation is just the first step in managing your AWS costs effectively. It’s important to monitor your actual usage and costs regularly, implement cost optimization best practices, and set up cost alerts and budgets to ensure cost efficiency and prevent unexpected expenses.